How To Propagate Rosemary In Water?
Rosemary is a spice we use often in our cooking, in any event when we have it around. In years past I’ve had the option to leave the front entryway and cut a couple of branches off the huge rosemary shrubberies before our means. I love the delightful way simple rosemary is to propagate. Truth be told rosemary is so natural to root that how to how to propagate Rosemary in water.
Rosemary Plants Propagation:
One of my planting methodologies is to make a few cuttings and put them in various territories. Each nursery around our home has an alternate miniature atmosphere (some significantly more than others) that increases the chances of in any event one plant surviving. Fortunately, I had one rosemary left planted close to our porch and close to the barbecue with its dark spread. Both the barbecue and the yard accumulated warmth during the day and delivered it around evening timekeeping that territory somewhat hotter during the winter. It’s likewise on the bright side of the house which helps a decent arrangement in the virus season. So, see below how to propagate rosemary in Water.
How To Propagate Rosemary In Water:
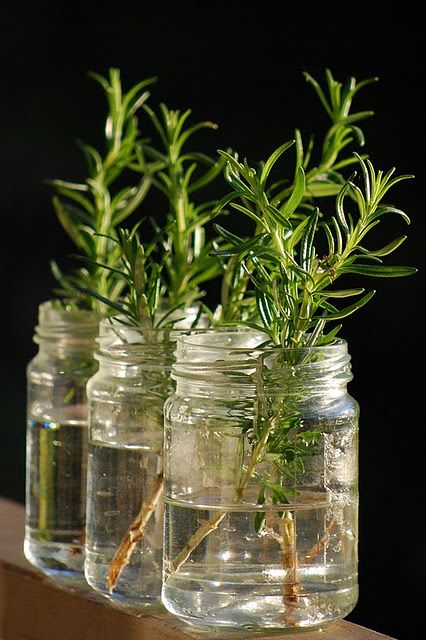
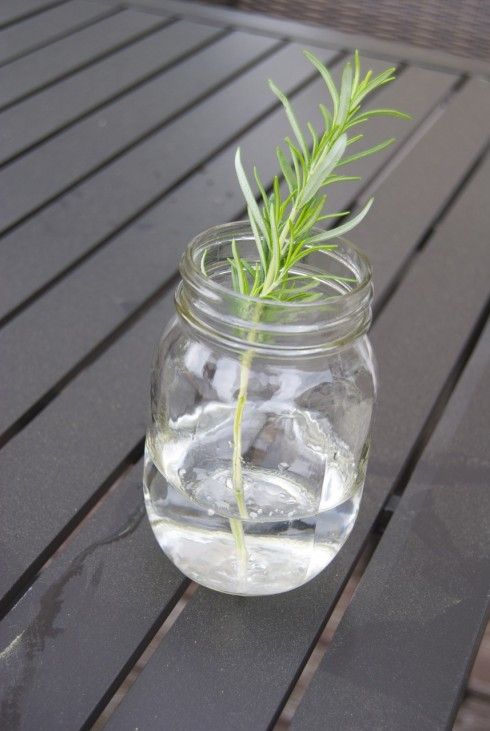
While propagating rosemary in the water you should simply take a couple of cuttings like the one in the first picture. It’s around 6 inches in length. At that point, I peeled the leaves off the base of the branch. This aspect of the propagating rosemary makes an ideal chance to do somewhat culinary enchantment! Spare the leaves you peeled off and dry them for later or put them in your preferred bread formula.
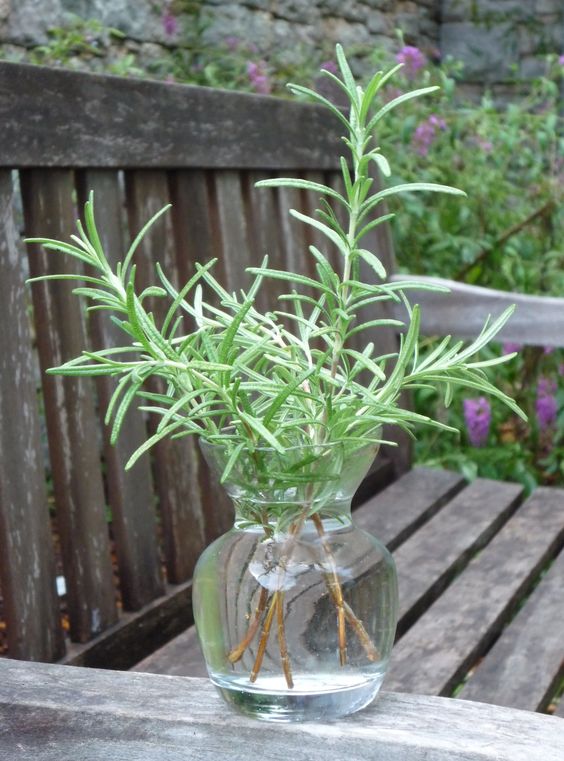
At that point, I set the rosemary cuttings in the container of water underneath. In possibly 14 days, these cuttings should begin rooting and I can plant them outside where I need them to develop. The water level should remain under where the leaves are so no leaves are under the water. So, see below how to propagate rosemary in Water.
Step 1:
Make a well put together using a sharp blade or scissors around 4 to 6 inches down from the tip of a delicate, new branch. With rosemary, this can be anytime in light of the fact that the leaves become so near each other, however, with different spices and plants make certain to make your cut just under a branching point or leaf petiole.
Step 2:
Eliminate the lower leaves. You can clasp or pinch them off or, with rosemary, they effortlessly come free by running your fingers down the branch.
Step 3:
It’s conceivable to establish rosemary cuttings in water, simply make a point to change the water day by day so microorganisms don’t get an opportunity to develop. Put a drop or two of fluid ocean growth into the water to give your cuttings a lift, or potentially plunge newly pruned cuttings in fluid kelp before submerging. In any case, I find I have better achievement and more grounded root development when rooting cuttings in a 50/50 blend of vermiculite and perlite.
Step 4:
When growing cuttings in vermiculite and perlite, make a pocket for the leafless finish of the cutting and afterward take care of the blend around the exposed stem. Press in and around the surface to ensure the stem has great contact with the blend, and water well.
Step 5:
In the event that your home or zone where you’re growing your cuttings is drafty and cool, place a make-move nursery over cuttings to trap in warmth and dampness. Simply try to mind cuttings in the event that an excessive amount of dampness develops, which can make cuttings become rotten. Eliminate the “nursery” allowing the plants to ventilate varying.
Step 6:
Ensure the growing medium remains uniformly sodden which is simple when using vermiculite and perlite during the whole rooting measure.
Step 7:
Check your cuttings in around 3 to about a month to check whether roots are taking shape. Burrow down with your finger and investigate or give your cuttings a delicate pull test. (The pull test is regularly not suggested by numerous individuals for dread you could harm new, emerging roots yet I’ve never had this issue. Simply don’t yank on your plants and they’ll be fine.) If you feel an obstruction, there are decent possibilities roots have shaped and cuttings are prepared for transplanting.
Step 8:
When your rosemary cuttings have established, pot them up into bigger containers with potting soil, or spot them out in the nursery. It won’t take well before you’re harvesting from garden-to-table!
How To Care Rosemary:
- Rosemary is a fairly hearty plant once it is set up and growing. Here are a few hints to keep your plant sound and producing:
- Develop in a radiant location. Rosemary flourishes in 6-8 hours of direct sun in the mid year.
- Water when the dirt feels dry. Once set up, rosemary likes to remain on the dry side. Permit the top inch of soil to dry out among watering, and afterward water completely.
- Re-pot as the plant gets bigger and the roots fill the container. A rosemary plant that develops in a container can arrive at 1 to 3 feet high. Simply hold transplanting to a bigger container when the roots fill the pot.
- Prune rosemary frequently. The more you trim, the bushier the plant develops. Prune the plant after it blossoms to keep it minimized.
Tips To Grow Rosemary Indoors:
Rosemary is local to Mediterranean atmospheres so it favors a hot, bright, and muggy air. Here are a few hints for keeping your rosemary plants alive indoors during winter:
Light:
Locate your rosemary plants in a brilliant south-bound window. On the other hand, you can utilize develop lights and keep your plants glad during the winter months.
Water:
Try to keep the potting blend equitably sodden. Overwatering will make the plant decay. On the off chance that the dirt is excessively dry, the plant will shrink and kick the bucket. Water when the dirt dries out at the surface and let the additional dampness drain.
Temperature:
Rosemary likes it a piece on the cooler side during the winter. Get the plants far from heat sources and wood ovens. Around 60 to 65 degrees is ideal.
Humidity:
Winter heating keeps us warm, however, it likewise saps dampness from the air and drops the mugginess. Repay by misting your rosemary plant habitually, running a humidifier, or placing your rosemary plant on a plate of stones and water to increase the stickiness around your plant.
Irritations and Diseases:
Common bugs for indoor rosemary plants are red bug bugs, aphids, spittlebugs, and whiteflies. These nuisances suck on the plants and cause the foliage to shrink and evaporate. Inspect your rosemary plants oftentimes for bugs and control with organic insecticidal soap. Diseases, for example, root decay, fine buildup, and shape are generally indications of a lot of dampness and helpless air course. Permit the top inch of soil to dry out among watering, and afterward water altogether allowing additional water to drain out of the base of the pot. Run a fan to improve air dissemination around your plants.
Recommended Articles:-
Hair Growth Home Remedies: You Can Try
Hair Solution: Ayurvedic Treatment For Hair Loss And Regrowth
5 Ways To Use Rose Water For Skin Care
Hair Care Tips: Hair Care Tips For Men